(以下的文章是引用)
http://www.nirsoft.net/blog/2008/12/running-operating-system-inside-virtual.html
及
http://alexchuo.blogspot.tw/2009/08/windows-virtual-pc.html
常常由一個需求是將虛擬電腦設定與主電腦不同日期,因為試用版常常會過了某一天之後不能使用, 如果沒有特別設定, 虛擬電腦會以主電腦的日期為虛擬電腦的日期, 這樣試用版軟體就不能使用了。
以下的設定我在新版win7安裝的virtual pc可以使用(不是virtual pc2007)
Running operating system inside a Virtual PC with specific date/time
When you run operating system inside a Virtual PC, the current date/time is automatically taken from the host operating system.
This feature is useful for most cases, but sometimes you may want to run the guest operating system with specific date and time, instead of the current date/time.
You can do that simply by changing the date/time of your computer, but this change will also affect the other programs running in the same machine.
To change only the date/time of the guest operating system, you can use one of the following methods:
- Manually change the .vmc file:
The .vmc files contain the configuration of each virtual machine and are usually located under [User Profile]\My Documents\My Virtual Machines\[Virtual Machine Name]
You have to make 2 changes in the right .vmc file:
A. Disable the time synchronization:
在.vmc中<base_board>前面加上 <time_sync_at_boot type="boolean">false</time_sync_at_boot><hardware> <bios> <time_sync_at_boot type="boolean">false</time_sync_at_boot> <base_board> ... </base_board> ... </bios> </hardware>
Under the following mouse configuration:
<mouse>
<allow type="boolean">true</allow>
</mouse>
Add this:
<components>
<host_time_sync>
<enabled type="boolean">false</enabled>
</host_time_sync>
</components>
B. Set the desired date/time:
You have to find the time_bytes value inside the .vmc file, which looks like this one:
<time_bytes type="bytes">27003200110001201008</time_bytes>
After finding it, set the desired date/time value according to the following specification:
Digits 1 - 2 contain the seconds value.
Digits 5 - 6 contain the minutes value.
Digits 9 - 10 contain the hours value.
Digits 15 - 16 contain the day value.
Digits 17 - 18 contain the month value.
Digits 19 - 20 contain the year value.
In the above example, the date/time value is 11:32:27, 20/10/2008
After making the above 2 changes, save the .vmc file, and the guest operating system will start in the same date/time that you set in the time_bytes value.
C. 關閉虛擬機器的「網際網路時間」同步化功能:- 在工作列的小時鐘上,按下滑鼠右鍵,選擇「調整日期/時間(A)」指令。
- 按下「網際網路時間」索引標籤。
- 取消 □ 自動與網際網路時間伺服器同步化(S) 核取方塊,按下「確定」按鈕。
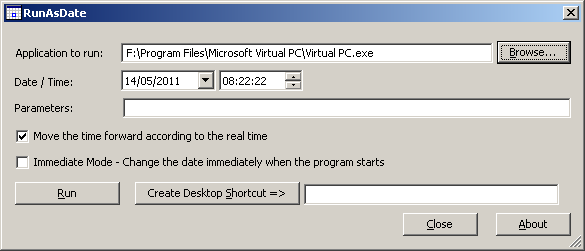
- By using RunAsDate utility:
In order to use this method, download and run the RunAsDate utility, choose the desired date/time, and select the path of the Virtual PC application, (It should be something like C:\Program Files\Microsoft Virtual PC\Virtual PC.exe) and then click the 'Run' button to start running the Virtual PC application. If Virtual PC is already running in your computer, you should close it before starting the new one.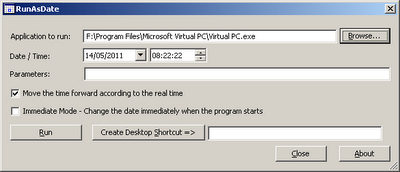
When you run the Virtual PC application within RunAsDate utility, all the guest operating systems that you run from it will automatically use the date/time that you set with RunAsDate utility, instead of the real date/time of your computer.
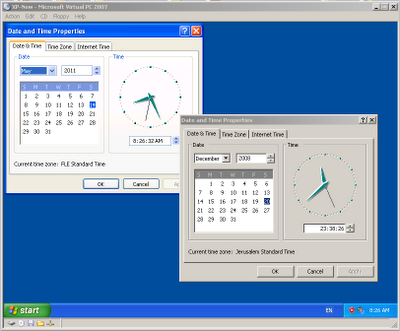
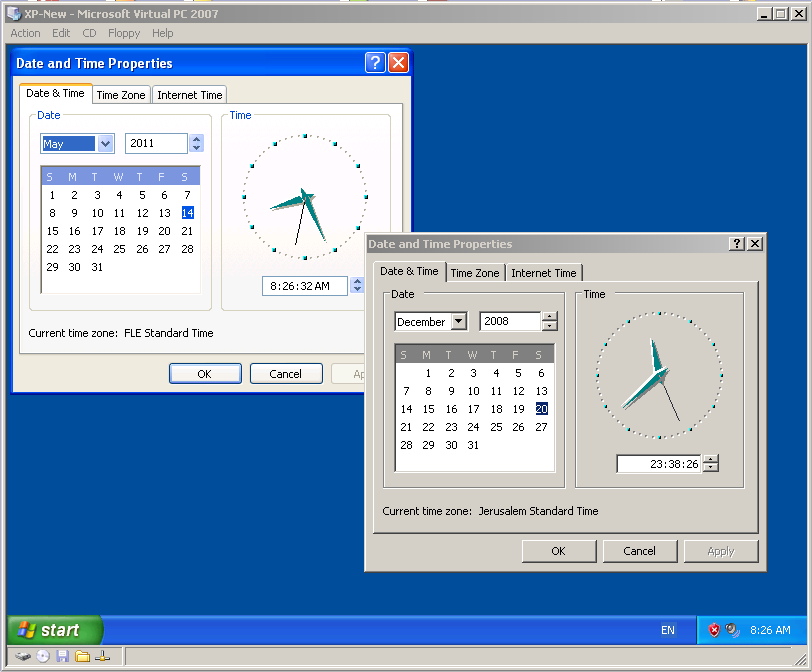
If you successfully used one of the above methods, you should have a running guest operating system with the date/time that you chose, while the computer's date/time continues to run normally:
沒有留言:
張貼留言